How to Reduce File Size
How to Reduce File Size
When submitting for Vket2021, you need to check two types of file sizes.
- Build Size of the Asset Bundle
- The total file size of the submission folder
In this article, we will explain how you can check and reduce file sizes.
1. Build Size of the Asset Bundle
Checking the total build size
Click on the Build Size Check
button under VketTools --> Control Panel.
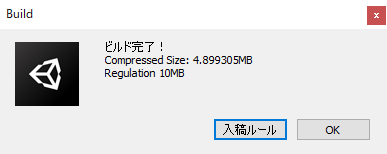
After a while, the Build will complete and the compressed size will be shown to you.
You can check the details including the file size by right click on the Console tab and Open Editor Log.
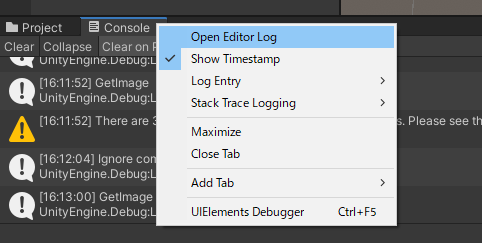
Search for vrcw
and you will see a log output with details including the file size.
example
Bundle Name: customscene.vrcw
Compressed Size:1.8 mb
Uncompressed usage by category (Percentages based on user generated assets only):
Textures 5.2 mb 84.3%
Meshes 89.6 kb 1.4%
Animations 0.0 kb 0.0%
Sounds 0.0 kb 0.0%
Shaders 797.2 kb 12.6%
Other Assets 8.1 kb 0.1%
Levels 46.0 kb 0.7%
Scripts 0.4 kb 0.0%
Included DLLs 0.0 kb 0.0%
File headers 52.1 kb 0.8%
Total User Assets 6.2 mb 100.0%
Complete build size 6.2 mb
Used Assets and files from the Resources folder, sorted by uncompressed size:
1.3 mb 21.6% Assets/VitDeck/Templates/04_CM/SharedAssets/Textures/04_PanelTop_Normal.png
1.3 mb 21.6% Assets/VitDeck/Templates/04_CM/SharedAssets/Textures/04_Floor_normal.png
798.2 kb 12.6% Resources/unity_builtin_extra
682.8 kb 10.8% Assets/VitDeck/Templates/04_CM/SharedAssets/Textures/04_PanelTop_Roughness.png
682.8 kb 10.8% Assets/VitDeck/Templates/04_CM/SharedAssets/Textures/04_Floor_metallic.png
682.8 kb 10.8% Assets/VitDeck/Templates/04_CM/SharedAssets/Textures/04_PanelTop_AO.png
204.6 kb 3.2% Assets/VitDeck/Templates/04_CM/SharedAssets/Textures/04_Panel_Dirt_BaseColor.png
204.1 kb 3.2% Assets/VitDeck/Templates/04_CM/SharedAssets/Textures/04_Panel_Dirt_Metalic.png
Under Used Assets and files from the Resources folder, file size of each will be listed in descending order.
Reducing file size
You can check the file size in the inspector when you select a file in UnityEditor's Project.
From the Inspector tab, you can change the format Textures are imported.

Tip1. Lower the Max Size
Unity can shrink down Textures when importing.
The default size is 2048. By selecting a lower value, the size will be reduced accordingly.
- It is recommended to lower Textures of small objects that won’t be viewed in detail at a distance.
- Reducing size is also recommended for Textures like gradients since differences are hard to notice.
- Most of the time, reducing black and white textures for things like masking will not degrade the looks. So it is highly recommended to lower the size.
Tip2. Checking Compression
By default, it should be set to Normal Quality. But if set to None, the file size will be massively increased, so revert it to Normal. The compression makes it look a bit rough, but mostly the impact should be unnoticeable.
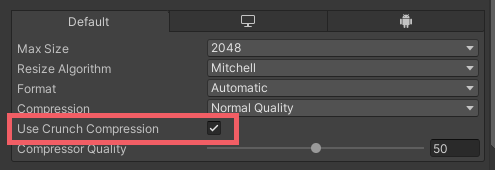
Tip3. Using Crunch Compression
This is off by default, but enabling it would greatly help reduce the file size. This will affect the looks more than other settings. Please use this setting if needed.
Tip4. Set Alpha Source to None
There is an option around the middle section of the Inspector called Alpha Source. By default it is set to Input Texture Alpha
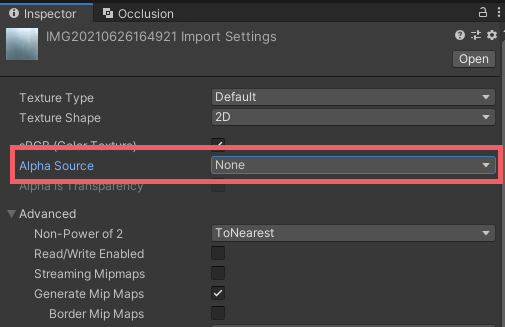
When set to Input Texture Alpha, the Alpha channel is imported from the texture. If you aren't using it, setting it to None will sometimes reduce the file size slightly. (Due to compression method being changed after the import.)
Tip5. Uncheck Read/Write Enabled in Texture
When checked, the file size increases slightly. This function is almost never used in VRChat so it is safe to uncheck.
Unity Manual on Texture compression format
Consult the Unity manual Texture compression formats for platform-specific overrides for a detailed explanation on texture compression formats. Unity selects compression formats depending on the above settings, allowing you to control the quality and size of textures.
Reducing the file size of Meshes
Meshes are another big factor in file size. Although it is more difficult to reduce the mesh size compared to texture, please try the tips below and see what could be done.
Tip1. Disable Legacy Blend Shape Normals
This is a new function added in Unity2018. We recommend disabling this function. When the checkbox is checked, a Warning may appear.
It is recommended to set blend shape normal to import or none instead, as setting blend shape normal to calculate will increase the build size depending on the number of shape keys. However, if you set the blend shape normal to none, the blend shapes will not change the normal, possibly affecting its appearance.
Tip2. Uncheck Import BlendShapes
If the meshes in your space do not use BlendShapes, unchecking this option can reduce file size in some cases.
Tip3. Delete Bones and Weights
If the Mesh doesn't move, using tools like SkinnedMeshBaker to remove bones can reduce file size in some cases.
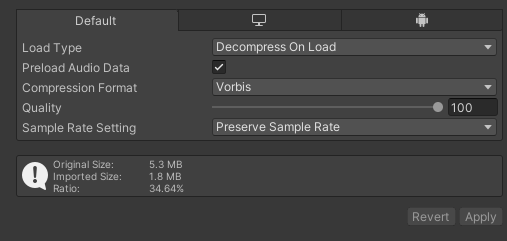
Tip4. Reducing the file size of Sounds
Sounds are another factor to keep in mind when reducing file size. It is recommended to adjust the Quality to keep the size low. Information about original and imported file size will be shown, so use them for reference.
Advice
In VRChat, the world's file size is shown when loading. The size shown there is indeed the build size of the AssetBundle, meaning you can apply the knowledge from this article to optimize your VRC Worlds too.
Although it won't be shown inside VRChat, the tips to reduce file size could also be applied to VRC Avatars. (Smaller file size will lead to faster load time)
For Avatars, the build log is recorded under customavatar.unity3d, not in customscene.vrcw. Apart from that, the properties are mostly the same.
2. The total file size of the submission folder
Check the file size of the submission folder using Windows Explorer. It needs to be smaller than 100MB for submission.

Reducing the file size
These three factors are the common causes of large file size.
- Image files for textures
- FBX files
- .asset files created using tools like MeshBaker
Reducing the size of image files for Textures.
Just like for build size, image files are the biggest factor.
Tip1. Convert PSD files to PNG
Images in PSD format save layer data, including ones hidden, so it could sometimes be larger than the imported result. It is better to export and optimize in PNG format.
Tip2. If you are reducing the Max Size when importing, lower the image resolution of the original file accordingly.
If you have reduced the resolution of the image to adjust the AssetBundle build size, you can edit the original image to match the resolution.
e.g. If you have imported a 4096x4096 image with Max Size of 1024, shrink the image itself to 1024x1024
This adjustment must be made with image editing software, so it is recommended to do it after adjusting the AssetBundle build size.
Reducing the file size of FBX files
FBX file size is almost proportional to the number of vertices. Reducing the vertex count is most effective.
Unused information such as BlendShapes and hidden submeshes should be deleted. (Things like expression parts and facials)
.asset files created using tools like MeshBaker
.asset files sometimes store contained data in text format.
If the file size of the .asset file is too large to ignore, use a 3D modeling software to merge the FBX models instead of using MeshBaker.