Setting up Reflection Probe
On this page, we will briefly go over how to set up and submit the Reflection Probe.
1. Introduction
The Reflection Probe can express the reflection of the surroundings on smooth surfaces like metals.
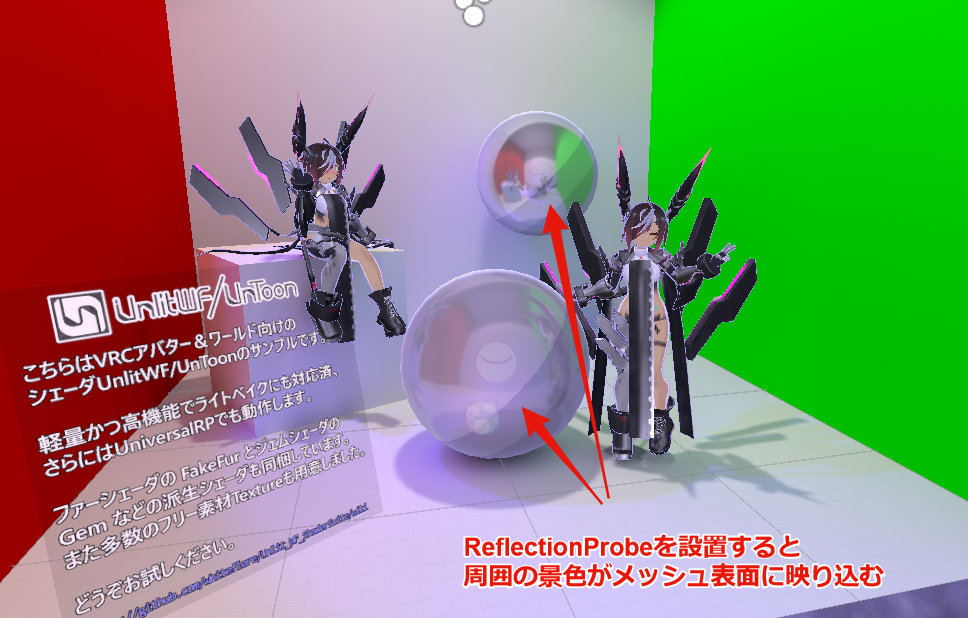
The Vket venue worlds already have Reflection Probes set up that covers all areas of your space. You don't need to do anything special to implement reflection of the world on Standard Shader or other shaders. If you allow the venue world to handle Reflection Probe, it is not necessary to set up Reflection Probe on the exhibitors' part.
On the other hand, if you wish to control the scenery reflected or use unique backgrounds, you can choose to set up your own Reflection Probe inside your space and make the submission.
Create your Reflection Probe
Reflection Probe can be created by opening the menu and selecting GameObject → Light → Reflection Probe at the location.
You can place the Probe inside either Static or Dynamic, but please set the static settings like Batching static in accordance with the Submission Rules.
2. How to set up Reflection Probe - Baked
This setting bakes the reflection of surrounding objects with Reflection Probe Static enabled. Unlike Realtime it won't reflect moving objects and Players, resulting in far less processing time.
2-1. Change the Type to Baked
Set the Type of the Reflection Probe to Baked. Please set the Resolution of Cubemap capture settings to be not more than 128 following the Submission Rules.
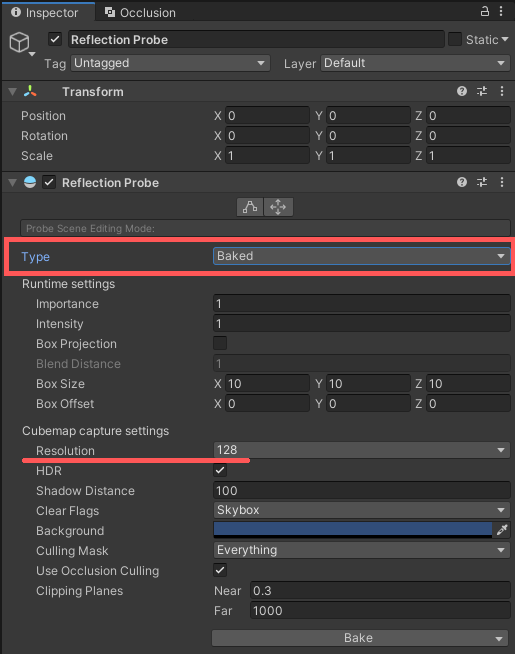
By submitting this Reflection Probe, it will capture the surroundings when the light is baked on the world side after placement.
3. How to set up Reflection Probe - Custom
Set the Type of the Reflection Probe to Custom. You will have more setting items and options to set the Cubemap.
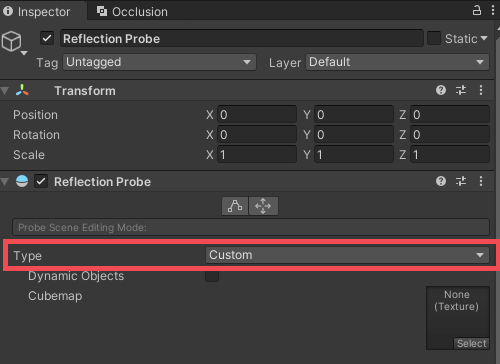
3-1. Change the Type to Custom
Reflection Probe will be captured where the sphere will be the central point. Please adjust the location first.
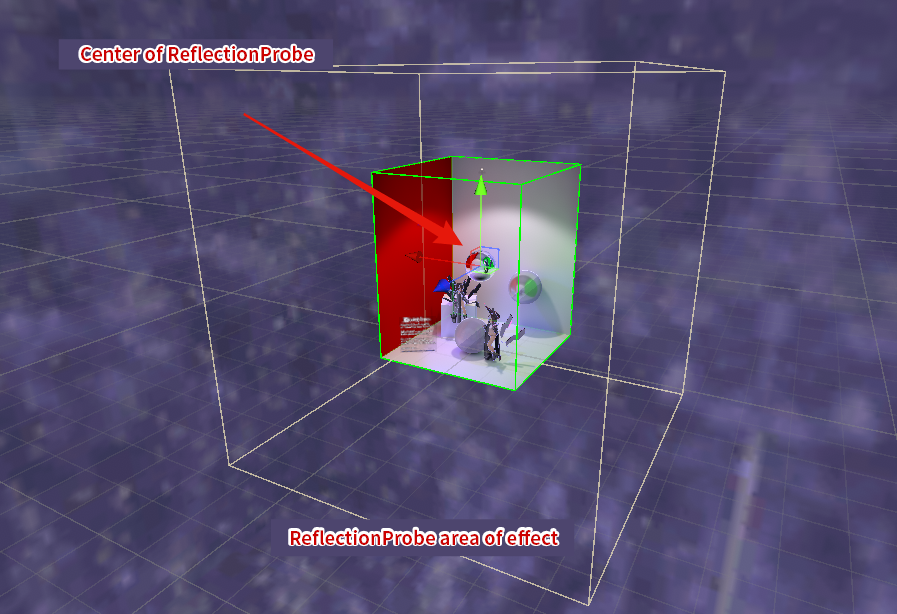
The reflection will affect meshes within the range defined by the Box.
Please note that this Box is an axis-aligned bounding box (AABB).
Upon placement in the venue world, the space will be rotated around the Y-axis, but this Box will not.
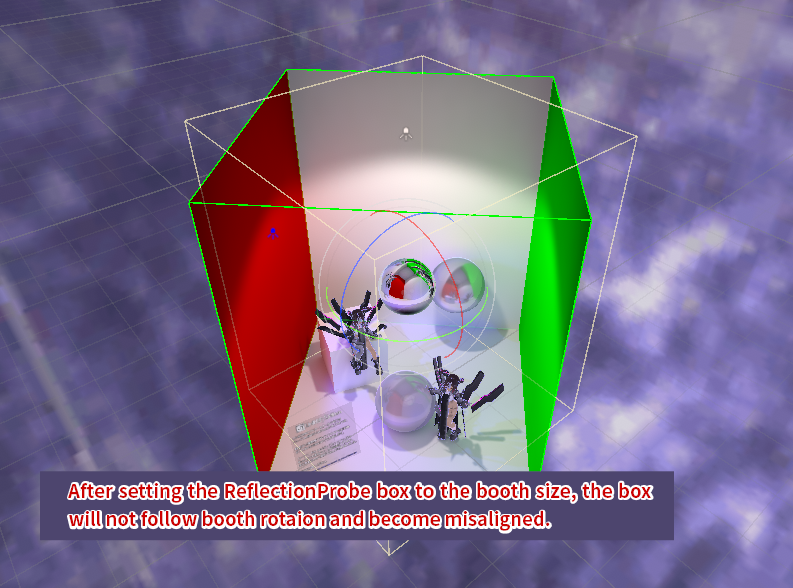
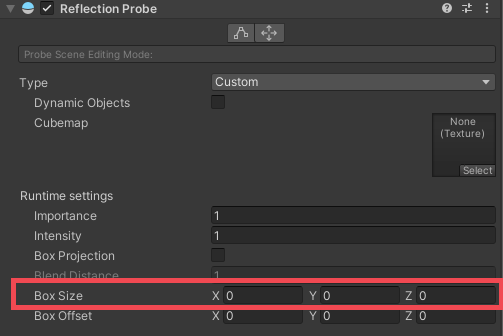
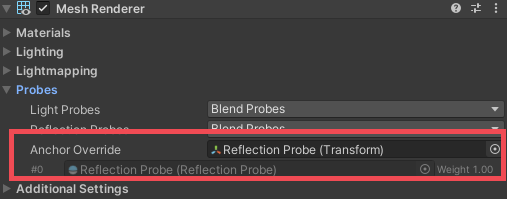
Thus, while in ordinary world development you may specify the area of effect by using this Box, in the case of Vket submission, it is more convenient to set the Box Size to be 0 and set the AnchorOverride of all target meshes to the Reflection Probe itself.
4. Set the Cubemap on Reflection Probe
Press Bake
button of the Reflection Probe. The Cubemap will be captured and you will see the saving dialog. If there is a Cubemap already set, it will be overwritten.
Move this Cubemap inside the submission folder.
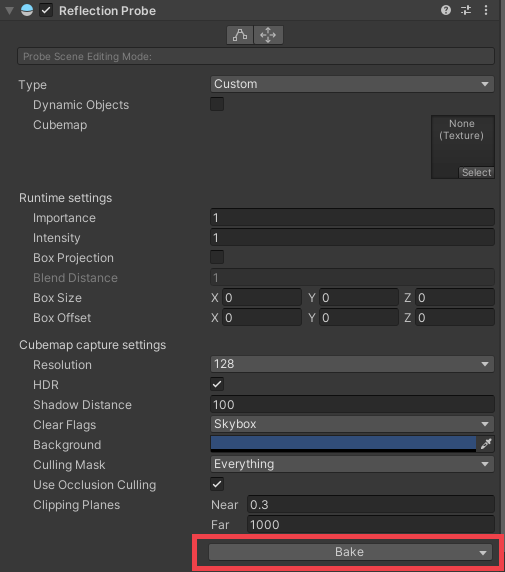
Instead of capturing the surroundings with Bake button, you may choose to set a Cubemap obtained elsewhere. In that case, please set the Cubemap file directly on the Cubemap setting.
Please note that pressing Bake button overwrites the Cubemap previously set.
In the past, around the time of Unity2017, there was a UnityEditor bug where the first light bake after changing the Type to Custom will overwrite the Cubemap, but this no longer happens after the Unity2018. We recommend backing up the Cubemap file just in case it may get overwritten.
4. How the Reflection Probe look like?
This is how you set up your Reflection Probe. From this section, you may learn how the Reflection Probe will look and how to adjust it.
The Reflection Probe tends to have a stronger reflection for smoother, planer, and wider mesh. It will become something like a mirror, where the difference between surroundings and mirror reflection is evidently visible.
On the other hand, for meshes with a smaller area with an uneven surface like metallic accessories, the probe will vastly improve their look from the reflection, but the difference from the real surroundings are unclear and hard to spot.
Hence, it tends to have vastly different adjustment difficulties depending on whether the target mesh has smoother, planer, and wider mesh
.
4-1. Accessory adjustment knowhow
If it's not smoother, planer, and wider mesh
, visitors will not notice if the Cubemap is different from its actual surroundings.
You can prioritize the look like metallicness and use the best-looking image.
You may utilize free assets like PolyHaven for Cubemaps. If you choose images with roughly the same coloring, even when the actual surroundings are grossly different people won't notice it and you can enjoy the merit of an improved look.
4-2. Mirror adjustment knowhow
In the case of smoother, planer, and wider mesh
, the difference will be noticeably evident. You will need to adjust it to look like the actual world.
This is required for meshes like mirror
, polished floor
, and varnished furniture.
In the next section we will cover the adjustment process.
5. Tips for adjusting the Reflection Probe to actual surroundings
5-1. Adjust the Skybox
Vket2021 submission scene has DefaultSkybox. Please temporarily set the Skybox when you capture, press the Bake button of the Reflection Probe.
As mentioned earlier, if the coloring is roughly the same, people won't notice that it has vastly different surroundings.
Instead of replacing the Skybox, you may choose to place a Cube surrounding the space and use 'VRChat/Panosphere` for its material.
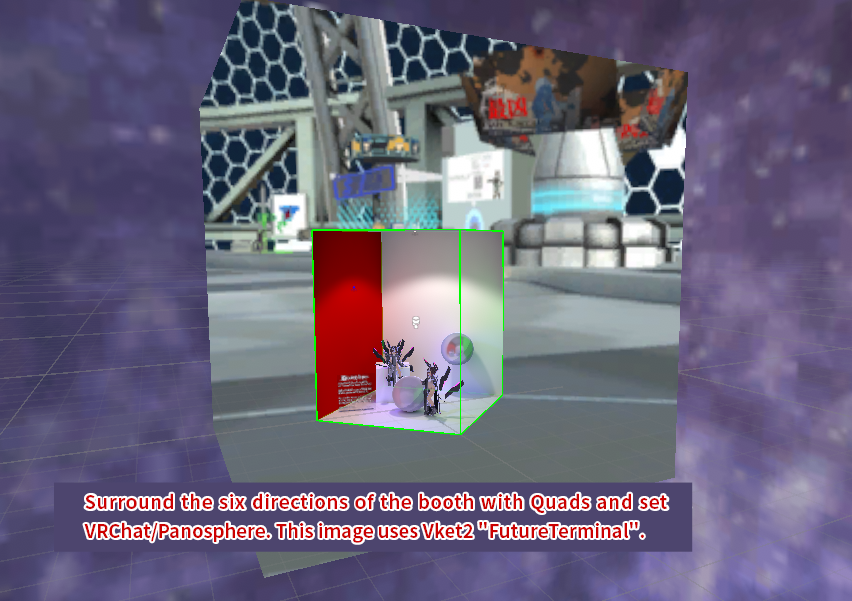
As you can use images with similar colors, for example for Vket2021 Edo Citadel Redux
you can use Panorama texture captured in Vket4 Alaya Vijnana
and for Vket2021 Almerea: The Town of New Beginnings
Vket5 Metekolebka.
5-2. Adjust the direction
Vket spaces are placed in the world with Y-axis rotation, but the Reflection Probe won't be rotated and it retains direction aligned with the world coordinate system.
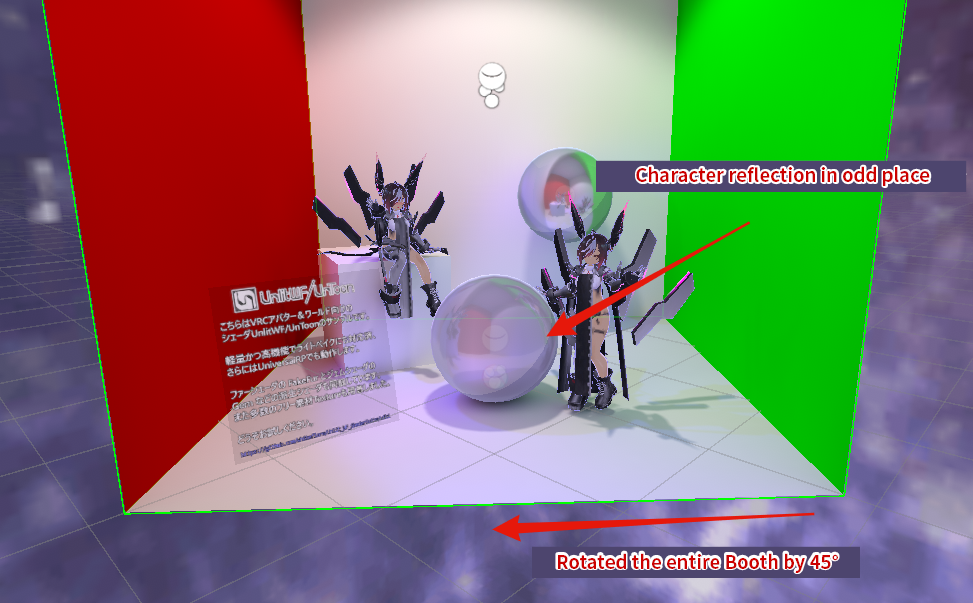
To fix this, please check the space placement direction in Preview World. Then, rotate the space in the submission scene and bake by pressing Bake
of the Reflection Probe.
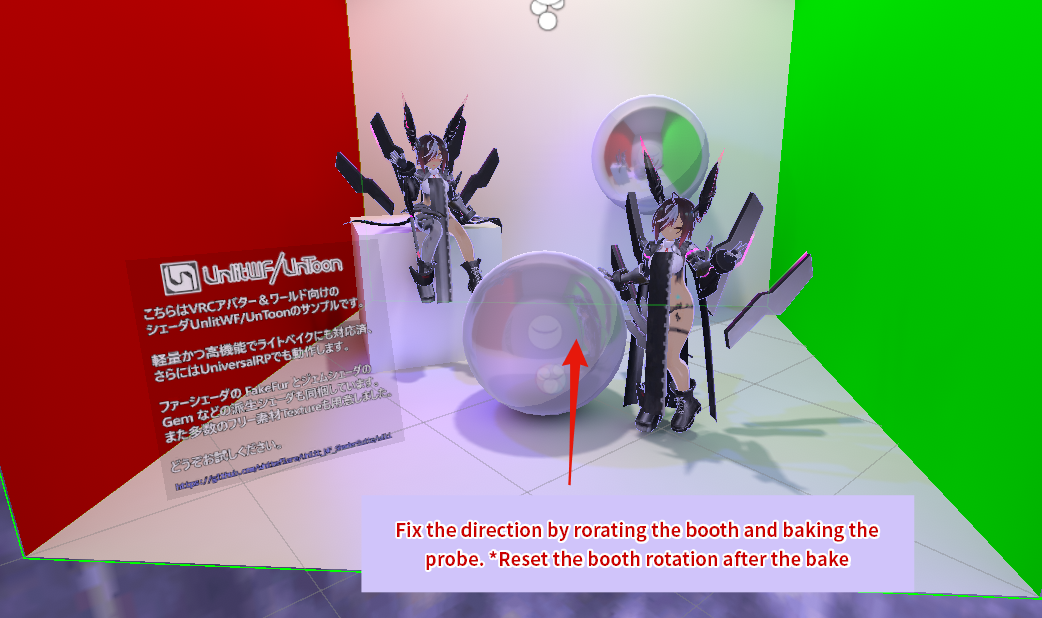
After the bake, restore the rotation of the space to the original state before submission.
5-3. Adjust the blend weight
At most two Reflection Probes within the affected area will be blended before being reflected.
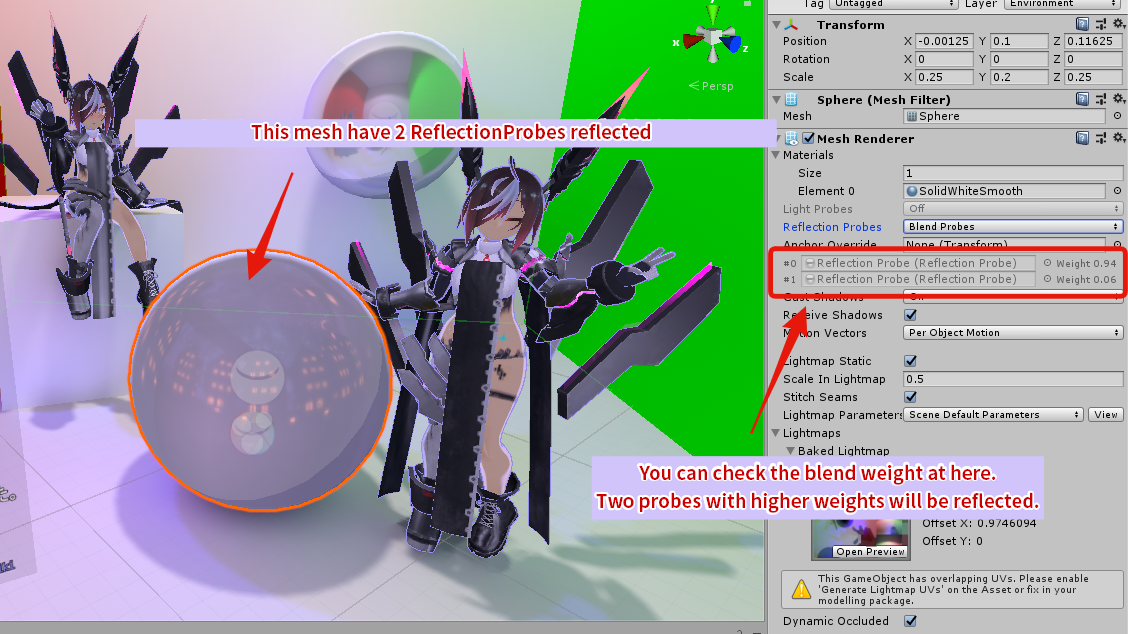
Since the venue world already have a Reflection Probe set up, normally, even if there is a Reflection Probe prepared by the exhibitor, the Reflection Probe of the venue side will be reflected.
By setting the Reflection Probe itself for AnchorOverride, you may overwrite this blending and only use the Reflection Probe prepared by you at all time. That's why we have instructed to set Reflection Probe on the AnchorOverride previously.
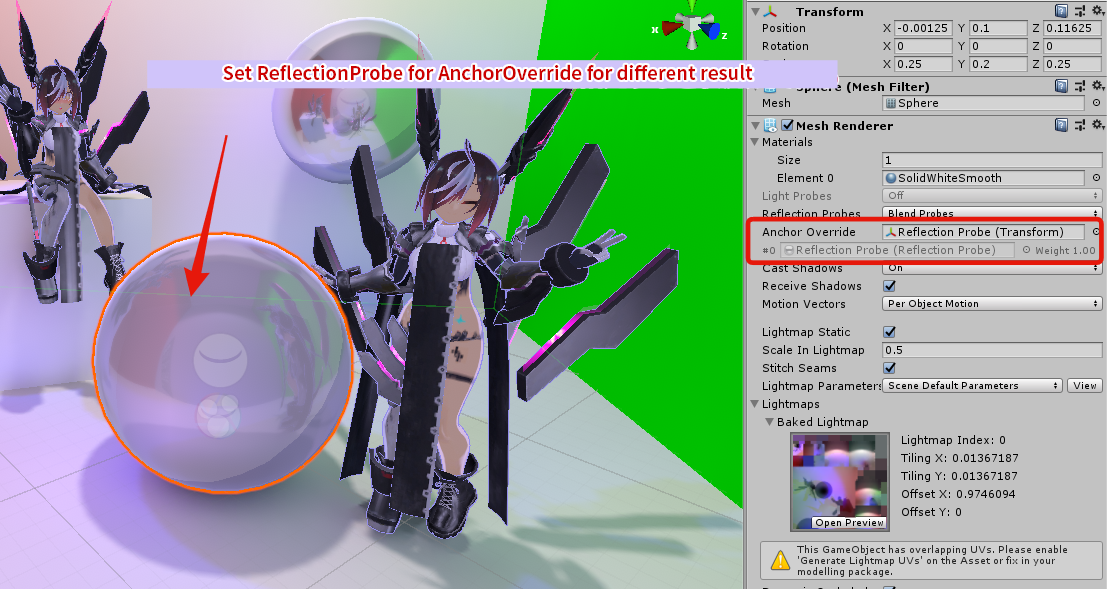
Please note that this is effective only when you directly set the Reflection Probe on the AnchorOverride. Setting AnchorOverride on another GameObject on the same location as the Reflection Probe won't fix the issue.